Working From Home + Homeschooling During COVID-19

I’ve seen many resources for working from home if you don’t normally (not an issue for me), and plenty of resources for homeschooling your kid, but nothing about having both parents working full time while homeschooling your child(ren). The situation we are in for working from home now, is nothing close to what a normal work from home situation is, and keeping that in mind as you read this is important. We are all stressed to the max, and trying to be safe. Please be kind to each other, and remember that we’re all doing our best to get through this.

I’ve seen many resources for working from home if you don’t normally (not an issue for me), and plenty of resources for homeschooling your kid, but nothing about having both parents working full time while homeschooling your child(ren). The situation we are in for working from home now, is nothing close to what a normal work from home situation is, and keeping that in mind as you read this is important. We are all stressed to the max, and trying to be safe. Please be kind to each other, and remember that we’re all doing our best to get through this.

I realize there are going to be differences in situations, but I’m going to share this how we are doing it, and with some optional modifications for people who may not have quite the same skills or access we have.

Both myself and my spouse are professional developers. I currently work for an essential services company, and my spouse works for a company that supports essential services, so we are still working full-time from home. On top of this, we have our daughter half the time, who is now home from school when she is here. We have her 2-3 work days per week, depending on the week. A brief aside, I want to commend her school district and her teacher for their tireless commitment to providing distance learning activities, as well as Teachers Pay Teachers and education.com for the resources available on their sites.

As an elementary aged child, and particularly our child, she prefers to know her schedule, but also wants to exercise control over her schedule and her activities as much as she can. This can be absolutely infuriating sometimes, but I know that it is good for her to assert herself, and learn how to in a safe environment.

We, as parents and full time employees, require structure as well. As developers we need time to sink into code, and in my case, be in several meetings per day (despite the attempts to cut down on the number of meetings we have as an agile team), which means uninterrupted time. We sat down and came up with the following plan to allow my partner and I to trade availability to the kiddo, and still be able to do our jobs.

The Ground Rules
    1. We tell her when our meetings are, and which of us to go to during that time frame. If we both have a meeting (our standups overlap) we tell her who she can interrupt for that meeting – for which, we take turns being the interruptee.
    2. As reminders, we have sign cards that help her remember who and when. Green is “good for interrupting at any point”, Yellow/Orange is “I can be interrupted, but do you absolutely have to tell me this now?”, and Red is “Stop! Only in an emergency should you interrupt!”
    3. If a yellow/orange is out for whichever, whomever, and whatever, she should write it down so she doesn’t forget, especially if the other parent is also unavailable at that time. Which we try to avoid, but it has and will happen.
    4. We will all eat lunch together.
The Routine

She has a set routine in the mornings and evenings. On the mirror in her bathroom, there are checklists for her to go through. I erase the boxes each night and re-draw them for her to check off again. These are all the activities she knows she needs to do and can do on her own. She also enjoys checking off, and we don’t have to repeat ourselves 72658276304928475 times.

AM

    • Potty
    • Shower (I read Harry Potter to her while she’s in the shower — we’re on book 3!)
    • Take vitamins
    • Brush Teeth
    • Brush Hair
    • Breakfast
    • Check Seesaw (her class app that she talks to her teacher through) for assignments from her teacher
    • Write a journal entry

PM

    • Potty
    • Brush Teeth
    • Floss
    • Fluoride
    • Brush Hair

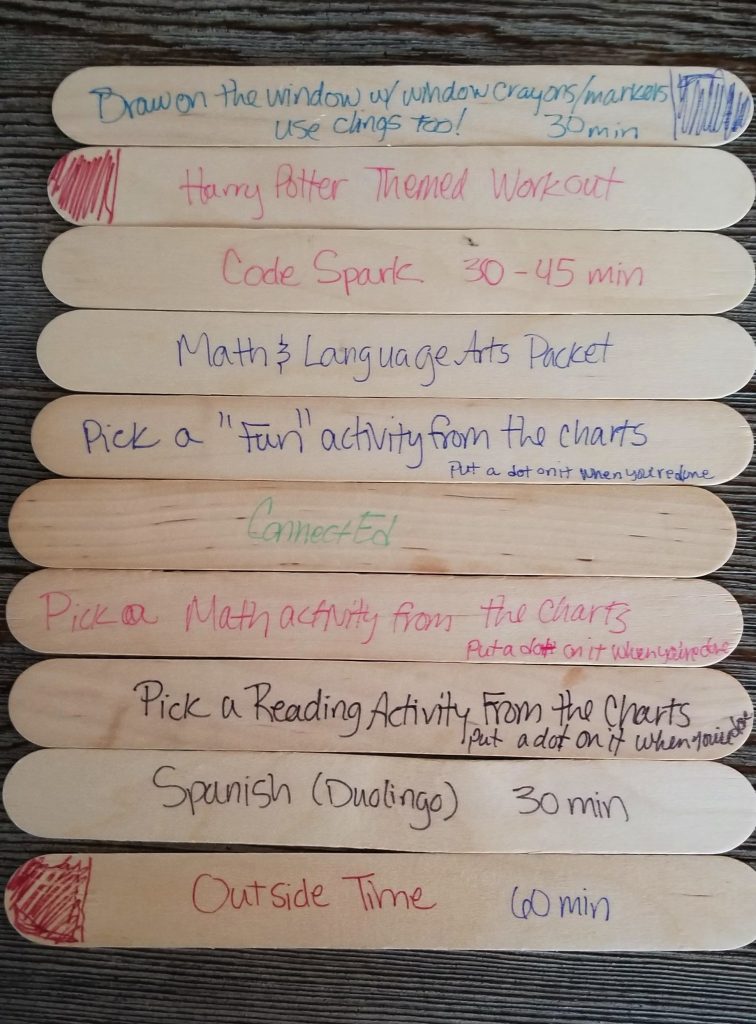
With these set lists, she knows how her day will start and end. The control over her day comes in the middle, and we call it Pick-a-Stick School. My partner and I discussed the activities that we should have her do to emphasize the learning that she was already doing at school, and I wrote them on jumbo craft sticks left over from our wedding. These are the ones that she didn’t get to today, below.

activities written on jumbo craft sticks

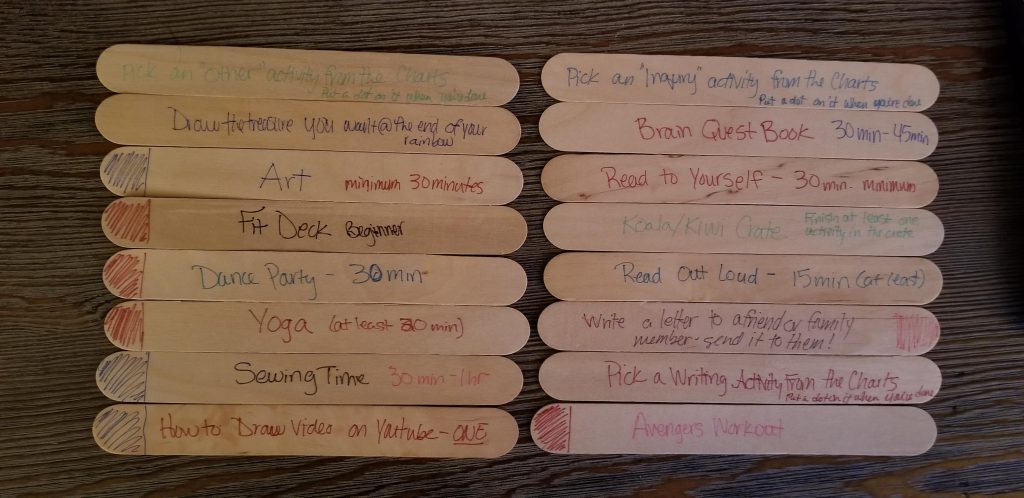
From the end of her morning routine (roughly when my standup starts — at least today, she slept in a bit) to the end of the work day, she picks a stick out of a vase, does the activity, picks another activity, does it, etc. Some of these are activities that her incredible school district sent home, some are activities we know she’d like, or that we already had to keep her fresh over summer break.  The colored ends mean that they are a category of an activity (physical activity is maroon, art is blue) and she can only pick 1-2 of those in a day. Some of these have time limits on them (sewing for example, because she still needs my supervision for that, and as you know, I still have a job to do), others are for her to do until she is done. One that is not shown here is to check in with her teacher on her app, if she hasn’t done so with one of her other activities already.

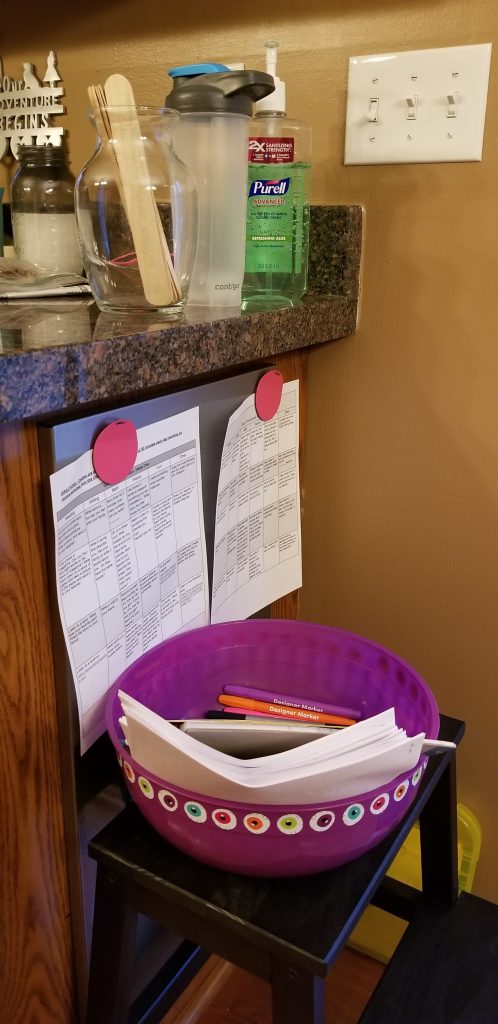
Everything she needs is in this corner, or very close by. In the picture below, you can see the vase with stick activities, the charts from her school, and a bowl with markers, pencils, colored pencils, a glue stick, and math/language arts packets I put together from Teachers Pay Teachers and Education.com.

Learning Station Photo shows vase and bowl of activities, charts of other activities

Today was the first full day of this process and it worked out rather well. This was her day today.

activities for today

Multiple times yesterday she said she was super excited to start her new routine, and many times today she looked at me and said, “I love stick school!” Which, if you’re a parent, you know is so rare, and absolutely phenomenal.

Notes
    • You don’t have to use craft sticks. Regular paper cut or folded up, a trello board (free) and digital randomizer (lots of them are free).
    • Duolingo is free.
    • If technology is a barrier, focusing on reading and writing is a great option. Those don’t require technology, and her teacher has been emphasizing this a lot in her communications with parents.
    • Outside time is NOT playing with her friends in our neighborhood. Currently she is working on roller blading without falling down, and learning to ride a bike without training wheels. She knows to stay 6′ away from everyone who doesn’t live with us.
    • Both of us parents have managers who understand the situation and realize that we have a bit of a different day to deal with than people who have stay at home partners, no partners, or no kids.

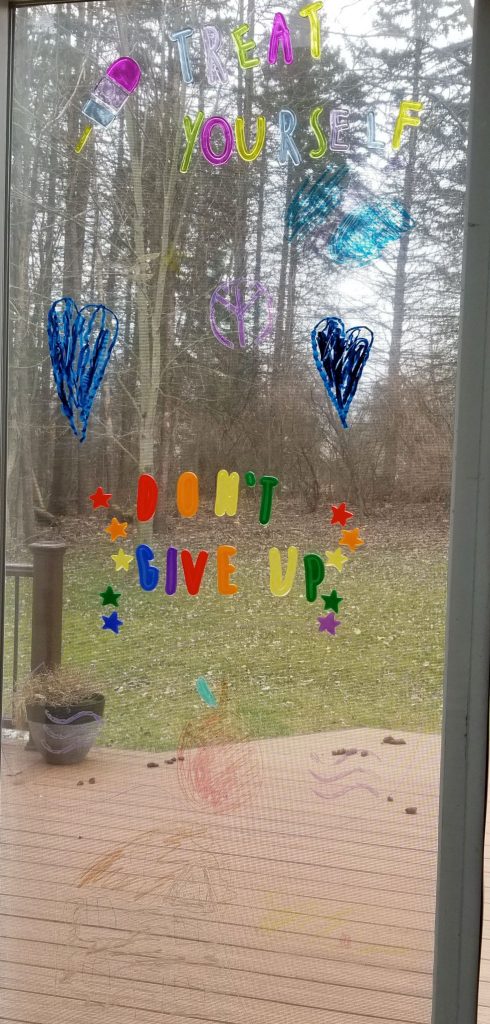
Even though we this set up yesterday and it worked pretty well today, we expect some bumps and bruises. She is not always going to wake up in a good mood. Some days she’s going to want to only veg on videos, or need some extra snuggles. We all cope differently, and do the best we can. I will probably post again if we have a major change to our plan, definitely am willing to answer questions, and have conversations about how we’re all handling this. It’s hard, but as the kiddo put in her window art this morning: Treat yourself, and don’t give up.

picture of window that has art that says treat yourself and do not give up

Laravel + WordPress Part 2: The Laravel Part

Now that we have WordPress all set up, and secured, we can move on to setting up the Laravel portion of the process. 

If you haven’t read Part 1, you can read it here.

Now that we have WordPress all set up and secured, we can move on to setting up the Laravel portion of the project.

Setting up the laravel part

Now that you have WordPress installed in your public > blog folder, we can set up the connections in your Laravel project.

Open config > database.php and add the snippet below with the details set to your database’s info.

'wordpress' => [
    'driver'    => 'mysql',
    'host'      => 'localhost',
    'database'  => 'your_db_name',
    'username'  => 'your_user',
    'password'  => 'your_password',
    'charset'   => 'utf8',
    'collation' => 'utf8_unicode_ci',
    'prefix'    => 'wp_',
    'strict'    => false,
    'engine'    => null,
],

Two things to call attention to in the snippet above. First, is the name of the connection. I called it ‘wordpress’, but you can all it whatever you like. Second, is the ‘prefix’ key. If you are using WordPress, all tables have the ‘wp_’ prefix on them, so putting this in here is VERY important, so that you don’t have to type ‘wp_’ a bazillion times if you are pulling info from your blog to other pages as I do both here and at Patternography.

Now that we have our database connection set up, there is an optional step to follow. If you are planning on pulling the entirety of post_content anywhere, we need to add the functions.php file to our composer.json, then run composer update in your project. This makes the wpautop() function available to our project.

If you are not going to be using the entirety of a blog post’s content anywhere, you can skip this step.

"autoload": {
    [...],
    "files": [
        "public/blog/wp-includes/formatting.php"
    ]
},

Now that we have all of this set up, we’re ready to roll. Make the controller and corresponding view files in your project if you haven’t already.

FullPostController.php

<?php

namespace App\Http\Controllers;

use Illuminate\Support\Facades\DB;

class FullPostController extends Controller
{

    public function index()
    {
        $post = DB::connection('wordpress')
            ->table('posts')
            ->join('users', 'posts.post_author', '=', 'users.ID')
            ->select(array('posts.post_title', 'posts.post_content',
               'users.display_name', 'posts.post_name'))
            ->where('post_status', '=', 'publish')
            ->orderby('post_date', 'desc')
            ->first();

        $post_content = wpautop($post->post_content);

        return view('home', compact('post', 'post_content'));
    }

}

In the code above, the aim is to collect data to display one blog post’s title, author, and content in a view. This is where the name of the database connection is important. If you don’t specify the connection by name in DB::connection, you will use your default DB credentials which will fail since your blog isn’t in your standard DB for the project.

The $post variable then stores the return of the eloquent query from your wordpress connection, then the $post_content variable applies WordPress’ formatting to the post_content returned in the $post object. You then send both variables to your view, which we explore below.

fullpattern.blade.php

<div id="home-post">
    @if($post && $post_content)

        <h2>
            <a href="/blog/{{ $post->post_name }}">
                {{ $post->post_title }}
            </a>
        </h2>

        <div id="author">by: {{ $post->display_name }}</div>
        <div>
            {!! $post_content !!}
        </div>

        <div id="go-to-post">
            <a href="/blog/{{ $post->post_name }}">
                <h5> >>> </h5>
            </a>
        </div>

    @endif
</div>

Check that the variable exists, and has content, then get the title, author display name, post content, and the url you’ll be using. In this example, there is no looping because I only get the singular most recent blog post from the database to be on the page, but looping is possible here (and will be shown later in the post). If you are going to use pretty urls, be sure to turn on that functionality in WP settings.

A Note on Pretty URLS

I’m using the pretty urls on Patternography, though I am not on NextJen Mobile. I need to revisit pretty urls at a later date, because they work fine in production on PTY, but not on NJM, and I currently don’t have the bandwidth to figure out why.

If you are testing this using homestead on your local machine, you will not be able to use pretty urls. You do not have access to what you need to in homestead to be able to make them work.

This next example will use the standard URLs and show how to use excerpts. If you are going to use excerpts, you need to turn on excerpts for posts, and then you’ll need to suppress the excerpt from showing on the actual blog, unless you want it there, but I chose to suppress it via CSS.

ExcerptController.php

<?php

namespace App\Http\Controllers;

use Illuminate\Support\Facades\DB;

class BlogController extends Controller
{
    public function summaryPosts()
    {
        $posts = DB::connection('wordpress')
            ->table('posts')
            ->select(array('posts.post_title', 'posts.post_excerpt',
               'posts.post_name', 'posts.ID'))
            ->where(array(['post_status', '=', 'publish'],['post_type', '=', 'post']))
            ->orderby('post_date', 'desc')
            ->take(4)
            ->get();

        return view('blog/summary-posts', compact('posts'));
    }
}

Much like the previous example, we need to get the information to display. You’ll see that instead of post_name we get ID to build the plain URLs to the post(s), and the post_excerpt. I use ->take(4) to get the newest four blog posts instead of every blog post I’ve ever written.  Because I can control the excerpt given, I don’t apply the wpautop() function to the excerpt. I know that I will only ever use the first paragraph, no matter how small it is, in my excerpt so I don’t need the formatting of an entire post.

excerpt.blade.php

<div>

    @if(isset($posts) && !empty($posts))

        @foreach($posts as $post)
            <div>
                <h4><a href="/blog/?p={{ $post->ID }}"><strong>{{ $post->post_title }</strong></a></h4>
                <p>{{ $post->post_excerpt }}... <a href="/blog/?p={{ $post->ID }}"> <em>read more ></em> </a></p>
            </div>
        @endforeach

    @endif

</div>

Like in the previous example, we check the $posts variable is there and not empty before proceeding. In this example we use a @foreach loop to create the view for the user, and show all four post excerpts. You’ll also notice that for the URL to the post, we do a little more work, and add the /?p= before dropping in the post ID. This is instead of using post_name that you use for pretty urls.

Now, I’m not sure why pretty URLs works in Patternography and not here on NextJen Mobile, but I’m guessing it has something to do with migrating between servers, and I missed something when I moved NJM to its current home. But you can bet I’ll write about it if I figure it out, I just don’t have the energy to take down my production site for the hours it would take to troubleshoot for something as small as this.

Suppressing excerpt on main blog pages

Because I use the first paragraph of each post as the excerpt, it would obviously be very repetitive to have the excerpt right under the title of the post and then immediately be the first thing you read again. If you are using your own theme, just add this to the styles.css you created with that theme. If you are not using your own theme, you can directly edit the CSS in your theme, but any changes you make will be wiped out after any updates. Making a child theme is a better long term solution, but you are welcome to do whatever suits you best.

.entry-summary {
    display: none;
}

one last note

You may have, at this point, realized I haven’t said anything about routing. You’re right, I didn’t. WordPress handles all of its own routing, and when you land on your /blog, you’ve left Laravel and landed in WordPress. Due to this, there is no need to add a /blog route to your laravel project. Even though I know this to be the case, it still wigs me out a bit to not have the route there.

I think that pretty much covers everything you need to incorporate WordPress into a Laravel project!

Happy Coding!


Laravel + WordPress Part 1: Setting Up WordPress

When I discovered Laravel a few years ago, I was mainly a front-end dev professionally and buried in the millions of frameworks that seem to multiply every day. Another day, another framework that claimed to fix all your problems. Needless to say I was rather tired of it all, so when I learned that there was a framework for PHP – I was not exactly thrilled. But, I downloaded it anyway to test it out, because I’m a glutton for punishment — why else would I be a developer?

When I discovered Laravel a few years ago, I was mainly a front-end dev professionally and buried in the millions of frameworks that seem to multiply every day. Another day, another framework that claimed to fix all your problems. Needless to say I was rather tired of it all, so when I learned that there was a framework for PHP – I was not exactly thrilled. But, I downloaded it anyway to test it out, because I’m a glutton for punishment — why else would I be a developer?

I ended up loving the framework. Sure, there are adjustments, and things I don’t want to do the laravel way because I’m stubborn, but I’ve adjusted. One of the things that I really appreciate is ease of multiple MySQL connections, which is a part of what I’m going to be talking about in this series of posts.

There is a frustrating lack of information if you don’t want to build your own blog tooling out on your site, and want to use WordPress for that functionality instead, like I do. Originally when I built the redesign for NJM in PHP/Laravel on 5.7, I used the built in WP API functionality with every intention of building out all of the front end nonsense for the blog part of the site. I never got back to actually finishing any part of that, and I learned new things before it even mattered, when working on Patternography, that would make it easier to do.

First, a warning: with this setup, you will not be able to use Envoyer for your deployments, or your blog will break for every publish.

Set up wordpress

Create a new Laravel project if you haven’t already, and create a blog directory in your public directory.

Visual showing the blog folder in the public directory of a Laravel project

Next, download WordPress and drop all the files into your blog directory. If you already have a database you want to use, update the wp-config. When you go to yoursite.com/blog, you will then go through the normal WP setup process. If you let the WP set up handle creating the database, be sure to save the credentials, you’re going to need them.

Login to your new WP back end and go to Plugins > Add New Plugin. Search for iThemes Security. It should be the first result and titled ‘iThemes Security (formerly Better WP Security)’. Install and activate.

Screenshot of iThemes Security listing in WP Plugin Search

A new link  (‘Security’) should appear with a notification in the top menu bar. Follow the prompts to get a free API key for your site. When that is complete, you should be dumped into the ‘Security’ menu item that appeared in your left menu. You’ll be in their settings menu at this point. Scroll down until you see ‘WordPress Tweaks’ and click on ‘Configure Settings’.

Visual of WordPress tweaks and the configure settings button

A new window will pop up. Scroll down until you see ‘REST API’. In the dropdown menu next to it, change ‘Default’ => ‘Restricted Access (recommended)’, then ‘Save Settings’.

Visual with arrows pointing to the dropdown box and save button mentioned

Now, no one without a specifically defined access can get to your API. There are tools out there that will allow you to do a very similar thing to what I outline here (like Corcel), but you would need to set up access to your API with other plugins not outlined here.

The next post will discuss the Laravel set up needed to include WordPress in other parts of your site, other than at /blog.

You can read part 2 here.